HTML5 Video: Everything I Needed to Know
Published: 2012-12-22 17:25:39 -0500
Updated: 2012-12-27
While there is a lot of good information on the Web about HTML5 Video, I wanted to put down everything that I gathered together about it. As I work on video projects, I will continue to add more and new information to this post.
This post is in the form of a tutorial where a single page is built up little by little as new problems arise or new features are implemented. I hope for this to be a gentle introduction to HTML5 Video.
Some of the information that’s out there is outdated. Some is incomplete or goes deep into areas that were not important for my projects or what I might want to do. Nothing here is particularly original, but gathering it together will at least help me when I have to come back to a video project. I publish it here in the hopes that it might help someone else as well.
If you read this and something was missing that you really needed, please let me know.
I had originally hoped to publish this in my favorite journal, but I could not complete it in time or find the right hook to differentiate it from all the other writing on the topic out there on the Web. Since I’ve done quite a bit of work and a whole lot of reading, I thought I’d at least publish my incomplete notes. If you see “YKK” anywhere in the text, those are sections I’m still working on and that need to be zipped up.
Introduction
If you use an iOS (or even a recent Android) device, when you go to view some Web pages with video you’ll sometimes be presented with a page that looks like this:

Do you have video on your site that is still delivered only through Flash? Are you about to start a project involving video? In this article, I’ll show you what you need to get started with publishing video on the Web so that it will work across browsers and devices. This will touch on all the aspects to get you started publishing video on the Web. I won’t go into depth on everything, but will point to the best resources for when you need to dive deeper. As we go along we’ll make the case for when you might want to consider self-publishing video this way. I’ll also show more advanced uses of Web video as well as some things that are just plain fun.
We’ll start with the simplest code that could possibly work. We’ll then solve problems as we go along and I’ll provide some background on each solution.
Let’s start by taking the video that ought to have shown up on this page and make it work across devices using HTML5 video.
Simple Markup
The HTML5 (or HTML the Living Standard as it is now officially know within the WHATWG) introduced the video element several years ago. This allows you to embed video on a page similar to how you can embed an image with the img element. Since video is time-based media, it has many more features–and complications–than an image.
Let’s dive right in and look at the simplest HTML document with a video that will validate. Note first that the doctype html ensures that the markup will be treated as HTML5, since the video element is new to HTML5. This video element has a single src attribute pointing to the relative URL for an MP4 video file. The video element cannot be self closing so there is a closing video tag.
html simplest HTML5 video
<!doctype html>
<html>
  <head>
    <title>Simplest HTML5 Video</title>
    <meta charset="utf-8">
  </head>
  <body>
    <video src="http://siskel.lib.ncsu.edu/RIS/getting_a_book/getting_a_book.mp4" controls></video>
  </body>
</html>
If it were just that simple then HTML5 video may have taken off a lot sooner and been more ubiquitous by now. If you look at the page in an older browser that does not understand the video element, the video will be completely ignored. Nothing will show up on the page and the user will not have any access to the video. To accommodate older browsers having some access to the content you can include some text and a download link like the following. Browsers that do understand the video element will not display this text.
html simple with text fallback
<video src="http://siskel.lib.ncsu.edu/RIS/getting_a_book/getting_a_book.mp4" controls>
  <p>Your browser cannot play this video. You might try to <a href="video/getting_a_book.mp4">download it</a>.</p>
</video>
This is the first fork in the road for whether you can publish using HTML5 video. Any time you use the video element it is simple enough for users to just download the video. Right clicking on a video will often show a menu option for “Save Video As….” The browsers seem to prefer to download the type of video it can play, but failing that will download what is there. If there are restrictions on the use of the content or you need digital rights management (DRM), then you will not be able to use HTML5 video at this time (more on video DRM). If you’re looking for live, adaptive streaming, this also won’t currently work for you (See HLS on longtailvideo and HTTP Live Streaming). These features are in the works and likely to be implemented by browser vendors, but we may be a ways off from that yet.
For many use cases in libraries and other cultural heritage organizations, DRM and live streaming are not necessary. The openness of HTML5 video is in service of libraries’ goals. We want folks to use our content in whatever way they can. When we make instructional videos available we don’t care if someone downloads and uses them. For some special collections materials, it can aid the researcher to be able to download the video to do their work. We want our promotional videos to get watched. (When we cover video processing, we’ll see one way where branding can travel with the video.)
Now that we see when it may be appropriate to use HTML5 video, we are still presented with some problems. If you look at this example in Firefox you begin to see the real problems that HTML5 video present (Note: More recent versions of Firefox on some platforms may not see it).
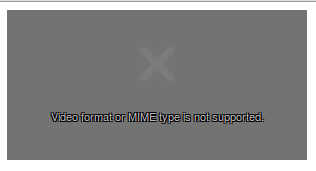
It displays an ugly message “Video format or MIME type is not supported” in some barely legible text–not too helpful to most users. In most cases, Firefox cannot currently play MP4 video that uses the H.264 codec. (This is beginning to change on some platforms as Firefox is implementing MP4 support when it can use an OS library or hardware decoder.) Mozilla will not incorporate in their own code a patent-encumbered proprietary codec that needs to be licensed. (Note: Until 2016 some uses of H.264 carry no cost for a license.)
What we really want to do is have our video work across browsers. To make it work in Firefox and other browsers like Opera that don’t use H.264, we have two options:
- Encode the video with a codec that Firefox understands.
- Fall back to Flash.
Let’s start with the first option and we’ll explore the Flash option later.
More Sources
To solve the Firefox problem we need to include a video source that Firefox understands. You can see which browsers support with which codecs. Firefox supports WebM and Ogg Theora, so we’ll use WebM. (More on codec choice later.)
To include another codec to make our example work in Firefox we can change the markup like this:
html with WebM
<video controls>
  <source src="http://siskel.lib.ncsu.edu/RIS/getting_a_book/getting_a_book.mp4"/>
  <source src="http://siskel.lib.ncsu.edu/RIS/getting_a_book/getting_a_book.webm"/>
  <p>Your browser cannot play this video. You might try to <a href="video/getting_a_book.mp4">download it</a>.</p>
</video>
Instead of including the src attribute directly on the video, one or more source elements are nested within the video element. A browser picks the first video source which it is able to play. With this current markup Firefox tries to download part of the MP4 video. Firefox can’t play the MP4, so Firefox then looks at the next source element in the DOM and investigates that video to see if it can play it. In this case recent versions of Firefox (4+) can play the WebM file.
At one point in time the HTML5 video spec required browsers to support Ogg Theora (OGV). This did not set well with some browser vendors, so the language was changed to not specify any particular video format. This situation has lead to confusion and complication with using the video element. In order for it to work across all current major browsers it is necessary to encode the video in more than one codec. Most page authors do not want to have to encode their video into multiple formats. A manual process would be slow and cumbersome. Later I’ll show you how to script out the video conversions to make this easier. Because this is video, if you’re publishing a lot of video, even compressed video, the storage costs for double encoding may also be a factor for you.
MIME type on source
You can also see from the above how the algorithm for choosing an appropriate video source can be inefficient for some browsers. If there are several video sources, the browser may have to fetch pieces of each video file in order to find one in a format that it can play. Let’s save some bandwidth for ourselves and our visitors with a simple optimization.
By including the MIME type of the video along with each source the browser will only have to fetch the video which it has some certainty of being able to play. The MIME type is added as the value of the type attribute of the source element as below:
html with MIME types
<video controls>
  <source src="http://siskel.lib.ncsu.edu/RIS/getting_a_book/getting_a_book.mp4" type="video/mp4"/>
  <source src="http://siskel.lib.ncsu.edu/RIS/getting_a_book/getting_a_book.webm" type="video/webm"/>
  <p>Your browser cannot play this video. You might try to <a href="video/getting_a_book.mp4">download it</a>.</p>
</video>
Here we are just including the MIME type which represents the video container. Firefox (in most cases currently) will see “video/mp4” and skip to trying the next resource without downloading any part of the MP4 file. Firefox can definitely play WebM, so it will try that source. Since the video and audio codecs used within a container may or may not be supported, the browser may still not be able to play the video. Including the MIME type in the type attribute only improves the confidence level for whether the browser can play the video.
It is possible to get more specific and list the codecs so that the browser can make a better determination. This can be done by adding a codecs MIME parameter to the end. So our example can be updated to the following:
html with MIME types and codecs
<video controls>
  <source src="http://siskel.lib.ncsu.edu/RIS/getting_a_book/getting_a_book.mp4" type='video/mp4;codecs="avc1.4D401E, mp4a.40.2"'/>
  <source src="http://siskel.lib.ncsu.edu/RIS/getting_a_book/getting_a_book.webm" type='video/webm;codecs="vp8, vorbis"'/>
  <p>Your browser cannot play this video. You might try to <a href="video/getting_a_book.mp4">download it</a>.</p>
</video>
If you have video you can check which codecs are being used with a tool like avconv (formerly ffmpeg) like this:
avconv -i video/getting_a_book.webm
The avconv tool seems to give the most exact values among the tools that can report on codecs. You will, though, want to consult this chart to get exact values for codecs you’ll want to include in your markup in the codecs MIME parameter [http://wiki.whatwg.org/wiki/Videotypeparameters]. I have not found a tool yet that will return exactly the values that ought to be entered. Here’s an example of what it might look like, though I don’t have high confidence in these values.
canPlayType
You can also interrogate whether your browser can play a particular MIME type using JavaScript. This is our first peek into the JavaScript API for media elements. Open up the developer tools console (or Firebug) in your browser. You can use the canPlayType function to test whether a browser might try to play a video. Here’s some sample output from the Firefox console:
“`shell Browser Console
var video = document.createElement(‘video’); undefined video.canPlayType('video/mp4’); ”“ video.canPlayType('video/webm’); "probably” video.canPlayType('video/ogg’); “maybe” video.canPlayType('video/ogg; codecs=“theora, vorbis”’) “probably”
If the browser cannot play that type, then the empty string is returned. If only the MIME type for the video container is given, then the best response this will give should be, according to specification, "maybe." Firefox returns "probably" for video/webm, likely because of the limited codecs in use in WebM. In the case of the of "video/ogg" there are more codecs which can be valid for the container, so the `codecs` MIME parameter must be given before the browser can determine that it can "probably" play the video, which is the most certainty that can be given using this function.

[YKK insert link here to chart of results for all browsers to canPlayType]

While in most cases you will not have to do this kind of testing yourself, this example points to how the API creates lots of potential for what can be done with video on the Web. Many of the low level functions are exposed in the client. We'll see examples of more interest of how to use the JS API later.

## Video Processing ##

If you want to use HTML5 video in as many current browsers as possible the current advice is to encode to both MP4 and WebM. Take a look at this chart which shows which formats can be read by which browsers: YKK

The important thing for processing video for the Web is to put the metadata at the head of the video file. This allows the video to begin playing as soon as the beginning of the video has been downloaded. This is the piece of work that needs to be done within the video in order for progressive downloading to work with HTML5 video. (More on this later.)

Here is a simple command for processing a source MP4 into a proper MP4 derivatives for Web access:

```shell to access MP4
HandBrakeCLI -i "getting_a_book_orig.mp4" -o "getting_a_book.mp4" -e x264 -q 20 -a 1 -E faac -B 128 -6 dpl2 -R Auto -D 0.0 -f mp4 -X 640 -m -x cabac=0:ref=2:me=umh:bframes=0:weightp=0:subme=6:8x8dct=0:trellis=0 --vb 600 --two-pass --turbo --optimize
And here is a command for converting to WebM from the derivative MP4:
shell MP4 to WebM
ffmpeg -quality good -qmin 10 -qmax 51 -i "getting_a_book.mp4" "getting_a_book.webm"
You’ll likely have to play around with the values used for the conversions. Check the HandBrake and ffmpeg. It seems that ffmpeg is transitioning to the avconv tool which may have a different parameter signature, so you’ll want to check the documentation for your platform.
These examples are from the library I created for processing video in batches.
It is bad enough that we have to process video into two formats. Responsive video can require a compromise in size and quality. A video which looks good on mobile may not look good when it fills the space available on a wide screen desktop. A video which looks great on a desktop and has a larger file size will lead to wasted bandwidth on mobile. Eventually browsers or JavaScript players may have better, common solutions for switching from standard to high quality video sources. That would mean encoding video in yet more access derivatives, but it might be worth it depending on use patterns and bandwidth concerns. Until there is a good solutions more widely available, it may be better to make some compromises between quality and file sizes. What I’ve done above is set a max width of 640 pixels as a compromise size. (This double encoding is nowhere near as much as Netflix who reportedly encodes each video 120 times.)
There are complicated ways to do video switching that could work around this limitation using JavaScript. Some shims have the ability to do quality switching. All of this would mean processing the video into yet more derivatives to fit space or display quality. The decision we have made in the projects that I have worked on is to choose a dimension and quality that is a compromise between mobile download bandwidth and high quality big video on the desktop.
(OK, the media attribute of a source element along with an appropriate media query can be used for responsive video by having the browser pick a source based on device dimensions. Don’t use it. The media attribute may be removed from the HTML spec and replaced with a similar solution to what is used for responsive images.)
Also while you are processing video derivatives you ought to create a distinctive poster image for your video. So far our video has looked like a black box on the page giving no indication as to why someone would click the play button. You can include a poster image that will show up before any video is downloaded or played. Including a poster image means that you can give a taste of the video. The poster image can be reused in search results or browse pages to provide a better clickable area than just the title of the video.
A poster image is another access derivative that you have to create, but you can script creation of the poster image with the rest of your video processing pipeline. If you can use the first frame of the video as the poster image then you can use the following command.
ffmpeg -i "getting_a_book.mp4" -vcodec png -vframes 1 "getting_a_book.png"
If you fade into a representative frame, you might have to do something like the following. This takes the first 30 frames and makes a numbered image for each. You can then pick the image you want.
ffmpeg -i "getting_a_book.mp4" -vcodec png -vframes 30 "getting_a_book-%03d.png"
You might also look at other options for extracting out a poster image.
Another piece that you can automate is adding on credits. In my case we wanted the same message about rights, credits, and project URL to show up for the last frames of the video including the last frame. If the video ever was used on another site (granted in a lazy way without editing), it was important for it to have this information and library branding.
[YKK: Still need to flesh this paragraph out some.] File naming conventions and using templates. Using standard naming conventions where the base name of the file is the same for each access derivative and then only varying with the extensions can make it easier to use the URLs to the video in a template.
video element attributes
In this section we’ll cover the most important attributes which you can place on the video element (and other media elements like audio.
poster attribute
We mentioned above in video processing why you might want to create a poster image for your video. Here is how we can update our video to include a poster image with the poster attribute:
html poster image
<video controls poster="http://siskel.lib.ncsu.edu/RIS/getting_a_book/getting_a_book.png">
  <source src="http://siskel.lib.ncsu.edu/RIS/getting_a_book/getting_a_book.mp4" type='video/mp4;codecs="avc1.4D401E, mp4a.40.2"'/>
  <source src="http://siskel.lib.ncsu.edu/RIS/getting_a_book/getting_a_book.webm" type='video/webm;codecs="vp8, vorbis"'/>
  <p>Your browser cannot play this video. You might try to <a href="video/getting_a_book.mp4">download it</a>.</p>
</video>
Now we are presenting a video that someone wants to click on–or at least has some idea what they will be clicking on.
preload attribute
The preload attribute is a suggestion to the browser whether to buffer some of the video (auto), just the metadata section of the video (metadata), or not preload at all (none). The intention of this attribute is to provide hints to allow the server and client to be courteous to each other. The client can know whether the server believes it can handle the bandwidth. The server should provide the value that it believes would lead to the best user experience. The client has the option to ignore this attribute, though, as is done on iOS and Android. The attribute can be changed later, say from none to auto after the video has started playing, to indicate that it is alright to buffer a greater amount of the video. The preload attribute can be overridden by the autoplay attribute.
“The preload attribute provides a hint regarding how much buffering the author thinks is advisable, even in the absence of the autoplay attribute.”
autoplay (and loop and muted)
Like preload autoplay will not work on all devices and browsers. Mobile devices, iOS and Android, try to conserve bandwidth by requiring some user input before downloading any of the video. Do not expect the autoplay attribute to be effective in every case. It may also be in the future that browsers or a plugin may allow users to set a preference to never autoplay video.
Same advice goes for using the loop and muted attributes on mobile and currently in some other browsers. If you ever use a video in place of an image in promotional space on your library’s home page or a similar use, you might consider using these attributes. There is nothing more annoying then going to a page and having sound start unexpectedly and repeatedly. The muted attribute would still allow a user to turn on the audio track if they so desire.
(Note: Examples after this will remove the preload, autoplay, muted, and loop attributes to not annoy you any further.)
controls attribute
Ever since our first example we have included the boolean controls attribute on our video element.
This tells the browser that the browser default video controls should be used. We can remove the attribute if we want to, though. Why would we want to do that? To create our own controls.
And this leads us on to more about the JS API….
JavaScript API
So let’s look closer at the JS API. We’ve already seen how you can use the JavaScript API to discover what types of video your browser can play (canPlayType()). That’s just the beginning of what can be done with the HTML5 media elements API. We will cover just some of the properties, methods, and events that are part of the JS API.
In the following examples always assume that the variable video refers to the first and only <video> element on the page:
var video = document.getElementsByTagName('video')[0];
There are also a whole host of other properties you can get to through the JS API. Some are low level methods to show what time ranges are buffered, the current network state of the element, … YKK
The videoHeight and videoWidth properties return the intrinsic dimensions of the video, or zero if the dimensions are not known. These could be used
Properties
Duration
One property of the video is the duration which is reported in seconds. If you go to our most recent demo video play page and open up a console in the browser you can do the following:
“`bash Browser Console
video.duration 109.266666 ”`
I have used this JS in an administrative interface for a curated video clip discovery project. When an administrator adds a new video through a web form, I dynamically load a video element into the page with that video as the source and get the duration. I then save the duration along with other descriptive metadata about the video clip. This saves the administrator from possibly entering the value of the duration incorrectly in the form.
The duration can then be displayed back to the visitor as a small overlay over the video poster. This style of thumbnail can then be added to browse or search results pages. The whole video poster, textual title, and duration then becomes a big link target to click on to take the visitor to the video play page. It gives a visitor more information for whether they want to visit the page to play the video or not. The duration can also be added to the video play page for the same reasons in case the user comes in through Google instead.

For our example let’s just add the duration to the page using JS. We’ll also add jQuery to make the rest of our examples more concise.
html add jQuery and video duration to page
<head>
  <script src="//ajax.googleapis.com/ajax/libs/jquery/1.8.3/jquery.min.js"></script>
  <script type="text/javascript" src="/demos/html5_video/javascripts/duration.js"></script>
</head>
...
  <div id="duration"></div>
javascript duration.js
$(document).ready(function(){
  $('video').bind('loadedmetadata',function(){
    var duration = $('video')[0].duration;
    $('#duration').html('Duration: ' + duration);
  });
});
Paused and Ended properties
You can also get a boolean value for whether the video has been paused or ended. Before the video is played at all the value of paused will be true and the value of ended will be false. These values could be used with events on the page to do something different based on whether the video has been paused or ended.
“`bash Browser Console
video.paused true video.ended false // begin playing video video.paused false // once the video has finished playing video.ended true
#### getters that also have setters (muted, volume) ####
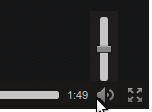
Some properties like `muted`, `volume`, `currentTime`, and `src` can be used as getters and setters. You can test out by looking at the volume control in your browser:

```bash Browser Console
>>> video.muted
false
>>> video.muted = true
true
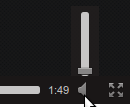
For volume 100% is 1 and 50% is 0.5:
”`bash Browser Console
video.volume 1 video.muted = false false video.volume = .5 0.5
#### Changing the Source ####
In our example we're currently using multiple source elements and allowing the browser to pick the source to play. If we check on the value of `src` it will be a blank string. To determine the current video source you will need to check the `currentSrc` property. (Your values might be different depending on which source your browser picked.)
```bash currentSrc
>>> video.src
""
>>> video.currentSrc
"http://localhost/html5_video_test/video/getting_a_book.webm"
If you set the src property dynamically, it will override the source chosen from the source elements. This allows you to create dynamic video switchers. Load this demo in your browser, open up the developer’s console, and then run the following script there. (Tip: In Firebug click on the ![]() in the console to enter and run this.)
in the console to enter and run this.)
javascript Raindrop video switcher
var video = document.getElementsByTagName('video')[0];
if ( video.canPlayType('video/ogg') ) {
    video.src = 'http://archive.org/download/TheAdventuresOfJr.TheRaindrop/TheAdventuresOfJr.TheRaindrop.ogv';
} else if ( video.canPlayType('video/mp4') ) {
    video.src = 'http://archive.org/download/TheAdventuresOfJr.TheRaindrop/TheAdventuresOfJr.TheRaindrop.mp4';
}
video.play();
This script simply finds the first video element on the page and checks whether it can play an Ogg Theora or MP4. If it can play either of those, then it changes the current video source to a video from the Internet Archive. Finally, it begins playing the video.
Now that you’ve enjoyed that video, here it is as a bookmarklet, so that you can watch it on any page where a video element is found.
Methods
OK, let’s get back to it. You’ll notice that the last line (video.play();) starts the video playing after changing the source. Any of the methods you can access through the browsers native video controls with a click (or touch) you can also trigger through JavaScript. This allows implementers to create their own video controls. Let’s create some very simple video controls.
First remove the controls attribute from the video element. This will prevent the browser’s native controls from showing up. Then add the following code just within the closing </body> tag:
html Custom Controls
<div id="controls">
  <button type="button" id="play">Play</button>
  <button type="button" id="pause">Pause</button>
</div>
Then we can use this simple jQuery (make sure to add it to the head) to have our buttons control the video:
javascript controls.js
$(document).ready(function(){
  $('#play').on("click", function(){
    $('video')[0].play();
  });
  $('#pause').on("click", function(){
    $('video')[0].pause();
  });
});
As those are just two of the methods available, there is a lot more you can do. You can then style your controls however you’d like to with standard HTML and CSS. The question is whether you really need to create your own video player controls from scratch. Later we’ll look at other reasons you may want to use a polyfill instead of rolling your own–at least for the basic player functionality. What’s important here is that by understanding how the JS API works you can add other functionality on top of those JS-based players.
Events
The JS API also provides a way to get access to various events. We can extend our last example to add some text to the page when a video has started playing, has been paused, or has ended. First, add this markup below the controls to hold our content:
html state
<div id="state"></div>
Then include the following simple script:
javascript state.js
$(document).ready(function(){
    $('video').bind('play',function(){
        $('#state').html('playing...')
    });
    $('video').bind('pause',function(){
        $('#state').html('PAUSED')
    });
    $('video').bind('ended',function(){
        $('#state').html('The End')
    });
});
By listening for the play, pause, and ended events we are able to do something. Here we just change the text in the div#state element, but we could make any other change we want to on these events.
timeupdate and currentTime
Even cooler are the events that get constantly triggered as the video plays. Listening for the timeupdate event of the video element can allow you to update the current time of the video on the page.
html current time
<div>Current Time: <span id="current_time"></span></div>
javascript timeupdate.js
$(document).ready(function(){
  $('video').bind('timeupdate',function(){
    var current_time = $('video')[0].currentTime;
    console.log(current_time);
    $('#current_time').html(parseInt(current_time));
  });
});
You can also see that clicking on the time rail in the browser’s native controls will also fire off the timeupdate event and update the time. The currentTime is given in seconds.
Open up the demo page in a browser and look at the developer’s console. You will see that the current time gets output to the console using the above jQuery. Different browsers fire off the timeupdate event at different frequencies. Chrome seems to fire the timeupdate event about every 1/8 of a second, while Firefox does every ¼ of a second. In both cases time is kept to a high level of precision. While the timeupdate event is triggered more often than every second we turn the currentTime into an integer before putting it on the page, so from the user’s perspective it does not update as often as the event is triggered.
Pretty Players, Polyfills, and Fallbacks
While it is possible to create your own fully functional, custom HTML5 video player using the JS API and have it styled perfectly to your specifications, you probably don’t want to do it. There are a lot of existing players with a lot of different features that are skinnable. These players will have already dealt with a lot of the issues with particular browsers and incompatibilities between browsers. The best place to start shopping for a player is the HTML5 Video Player Comparison table. Besides listing the features you might be interested in, you can try each of the players out on this site.
Two features that were important to me in selecting a player were Flash fallback and subtitle support. These features narrow the field significantly.
The fallback we currently have in place for older browsers that do not understand the video element is to download the video and play it in an external player. This still does not guarantee that the user will have a suitable player for the MP4 file. It also disrupts the user experience and would probably discourage some use. It would be preferable to have a video player in the page even for older browsers. It is possible to fallback to using a Flash-based player that can reuse the MP4. This works similarly to how our download links currently does except a Flash player object is embedded instead. Many of the existing players provide such a Flash fallback. The best style their Flash player the same as the HTML5 video player.
Since the Flash player reuses the MP4 needed for HTML5 video playback in some browsers, the Flash fallback also gives the option of only encoding the video once to MP4. Other browsers that understand the video element but cannot play the H.264 video would use the Flash version. My current advice is to encode to both MP4 and WebM and only use the Flash fallback for older browsers. Some current browsers would needlessly get the Flash fallback at a time when Flash is waning even inside Adobe. With the rapid release cycles of modern browsers, encoding to MP4 and WebM will serve an increasing majority of visitors. [YKK: get actual numbers here!]
I wanted a player that looked and worked similarly regardless of whether the browser used the HTML5 player or the Flash fallback. The table linked above has a column for “Unified Look/API.”
In the case of MediaElement.js, my preferred player, the unified API makes it possible to control both the HTML5 and Flash players with the same API. It mirrors as closely as possible the HTML5 API, though it does differ from that API with regards to setters. It also does miss some methods that are available in the full HTML5 API. Most of the core methods are there. Being able to control the flash player with the same API without caring whether the user gets the HTML or Flash player greatly simplifies the implementation of adding new features to a page so that they work across players.
Tracks
My other must-have feature in a video player is support for subtitles. While you may have a text transcript of your video available for folks who need or want it, that does not provide as close to the same experience for all users as you can. At least in the US, you probably also have some legal reasons why you need to have subtitles (with more rules coming into effect in the coming years). Equitable access is a civil rights issue.
To understand how to implement subtitles for video on the Web, we need to take a look at the track element. With the track element it is possible to improve the accessibility of the video in a few ways. There are several kinds of tracks that can be added. Subtitles and captions can be added to include a transcription or translation text cued with the video. A description track can be added in cases where the visual component of the video is obscured or not usable by the user. The textual description of the video can be used to synthesize an audio description. A chapter track can be added to improve navigation through longer videos.
So you should be able to add a track element like this and have it show subtitles to the user:
html subtitles track
<video controls poster="http://siskel.lib.ncsu.edu/RIS/getting_a_book/getting_a_book.png">
  <source src="http://siskel.lib.ncsu.edu/RIS/getting_a_book/getting_a_book.mp4" type='video/mp4;codecs="avc1.4D401E, mp4a.40.2"'/>
  <source src="http://siskel.lib.ncsu.edu/RIS/getting_a_book/getting_a_book.webm" type='video/webm;codecs="vp8, vorbis"'/>
  <track kind="subtitles" label="English subtitles" src="http://siskel.lib.ncsu.edu/RIS/getting_a_book/getting_a_book.vtt" srclang="en" default></track>
  <p>Your browser cannot play this video. You might try to <a href="http://siskel.lib.ncsu.edu/RIS/getting_a_book/getting_a_book.mp4">download it</a>.</p>
</video>
The track element includes a kind attribute so the browser or user will know how or whether to use the content. The label is the suggestion for what to display in a user interface that might be created for selecting tracks. The srclang attribute is the proper code for the language of the text of the track. The src attribute points to the file that contains the cues and text. The format used for these tracks is WebVTT, a W3C standard. WebVTT is a relatively new format, still under active development, which improves upon some of the design of past specifications for syncing cues and test with media on the Web. Some players might support other formats, though it seems that WebVTT will become the standard format in the future.
Here’s a snippet of what a simple WebVTT file looks like for our demo video:
WEBVTT
1
00:00:03.000 --> 00:00:08.616
Once you've used the library's online catalog to identify a book you want, you have to go get the book.

2
00:00:08.616 --> 00:00:13.308
On the bottom of a book's catalog page, there's information about the location of the book.

3
00:00:13.308 --> 00:00:17.928
This book is located in DH Hill Library, in the stacks, on the 8th floor.
A WebVTT file is just a plain text file. After the “WEBVTT” header are a series of cues. A cue is made up of a cue identifier, cue timings, and the cue payload. In this case the cue identifiers are all consecutive numbers. The next line “00:00:03.000 –> 00:00:08.616” shows the format for a cue timing, the duration that the text will display or otherwise be used. The final line(s) of a cue contains the payload which in this case is the text for subtitles. WebVTT defines other settings for a cue such as where the text should be placed over the video and some styling of the text. Cue text can be styled with CSS by including classes. Cue text for a particular cue can be timed as well for a karaoke effect. Cues are separated by two line breaks.
Because WebVTT is just a simple text file, it is possible to create and edit them by hand in any text editor. There are beginning to be tools available to create and edit WebVTT files. Microsoft developed a single page web application for creating WebVTT files. It is also a good example of a single page application which allows for interacting with video through the Javascript API. (Note: I had to make some changes to the Javascript behind this in order to allow the resulting WEBVTT files to work in mediaelementjs. From what I can tell this is a limitation of mediaelementjs and not an issue with this tool. The tool seems to follow the standard–at least as it was at the time.)
On the server the content type for the WEBVTT files should be set to “text/vtt;charset=utf-8”.
I’ve created a Ruby gem for parsing WEBVTT files. This allowed me to reuse the WebVTT file to put the on the page. By including more text on the page, the hope is that it will improve SEO for the content. You can then also provide links from lines of text to that point in the video. This can allow viewers to jump to the section of the video they’re most interested in. Instead of using the time rail to try to find the correct location in the video using the text to navigate the video may be easier for some users. It’d also be possible to create a video search tool which gets the user deep linked into the video. <!– [http://www.html5rocks.com/en/tutorials/track/basics/] –>
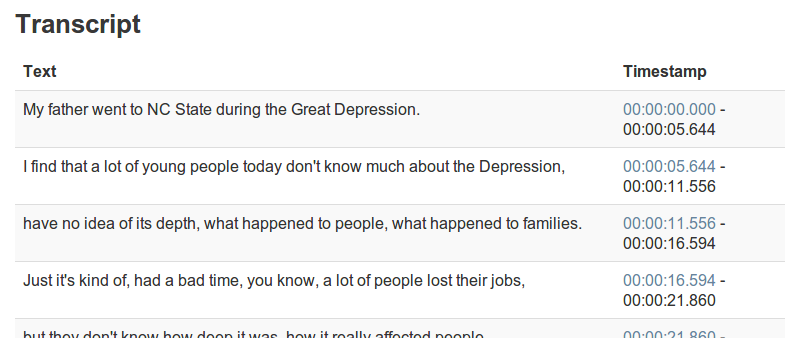
One simple thing is to just display the contents of the transcript on the page via Javascript. It won’t improve SEO, but it can help to make the page more accessible. [See “Displaying a Transcript” and the linked transcript.js file.]
html adding transcript to the page
<head>
  ...
  <script type="text/javascript" src="http://dev.opera.com/static/articles/2012/an-introduction-to-webvtt-and-track/transcript.js"></script>
  <script type="text/javascript" src="/demos/html5_video/javascripts/transcript_on_page.js"></script>
</head>
<body>
  ...
  <div>
    <h2>Transcript</h2>
    <div id="transcript"></div>
  </div>
</body>
Using a track element could also make it possible for an online translation service to do automatic translation of the WebVTT text into a different language.
This is all great, but not all browsers offer support for even the basic features of the track element. IE10 has been out in front with its support of <track> and will parse and display WebVTT tracks [YKK: citation?]. Chrome also has some support but it needs to be turned on through a flag. Firefox will parse the track but won’t display it. YKK http://net.tutsplus.com/tutorials/html-css-techniques/an-in-depth-overview-of-html5-multimedia-and-accessibility/. Providing support for the track elements, WebVTT, and displaying a user interface is a key area where polyfills or shims can come into play.
To get the tracks demo to work natively, you’d have to be using the latest version of Chrome (or an older version with “Enable <track> element” flag enabled on the chrome://flags/ page). [YKK: This gives a CORS error on localhost, is this working in production?]
Server Setup
Organization of Files
Since you’re just serving up video with a regular web server like Apache, IIS, or nginx, you can place files however you like. I like to have semantic, readable file names arranged in a modified Pairtree that takes part of the file name to create directories. It is easy for humans to traverse and scripts to calculate based on a file name. However you structure your directories, I recommend keeping all of the access assets related to a single video within a single directory. Any video derivatives you create can be placed alongside the poster image and any tracks like subtitles, descriptions, or chapters you create. Here’s a simple example of how you could arrange the files:
text structure for organizing video files
RIS
└── getting_a_book
    ├── getting_a_book.mp4
    ├── getting_a_book.ogv
    ├── getting_a_book.png
    ├── getting_a_book.vtt
    └── getting_a_book.webm
Setting the MIME type on the server
We have already shown how to configure source elements to include a type attribute with the MIME type of the source file. It is also necessary to configure your server to respond with the correct MIME type for your files in the Content-Type response header. Any Web server (Apache, nginx, IIS) ought to be able to have the correct MIME types set. For Apache you can set the correct MIME types like this in a conf file or an .htaccess file. Our demo does not use OGG so we would not have to include the “video/ogg” line.
AddType video/mp4 .mp4
AddType video/webm .webm
AddType video/ogg .ogv
Cross-origin Resource Sharing
As we saw with the bookmarklet example that loads a video from the Internet Archive, cross-origin requests for video files are not a concern. If you use a JS polyfill to provide support for subtitle or chapter tracks and you host your WebVTT files on a different domain than your HTML, then you may have to enable Cross-origin Resource Sharing (CORS). Generally if you have a hosting situation where your HTML and other assets are on different domains and you find XMLHttpRequest cross-origin errors showing up, then you may need to configure your server to set the correct CORS response headers. (Note that you can set something more specific than the “*” glob value.)
Progressive Download and Range Requests
HTML5 video does not work like streaming technologies or Flash. So how does the browser manage to play a long video without downloading the whole file before playing it? Part of the trick is that the video is encoded in such a way that the metadata is at the top of the file. This means once the first chunk of data is returned it is enough to determine whether the browser can play it all the way through. If you are encoding video for use with the video element, you will want to choose the Web optimized option in the encoding software. (See the section on video encoding above.)
The real trick though is how Web servers allow you to only download the a part of a file you request. The browser requests a chunk of the video at a time which allows HTML5 video to give the appearance of streaming. This behavior of mimicking streaming is called progressive download. This also allows fast seeking through the video by clicking the time rail on an unbuffered portion of the video. In general, requesting just a chunk of a file from a Web server is called a range request or “byte serving.”
You may need to do some configuration on your video server to allow for range requests. You can test this by looking at the response headers for one of your video files. Here we look at the headers for our demo video on the command line.
shell look at the headers
$ curl -I http://siskel.lib.ncsu.edu/RIS/getting_a_book/getting_a_book.mp4
HTTP/1.1 200 OK
Content-Length: 8343631
Content-Type: video/mp4
Last-Modified: Thu, 20 Dec 2012 19:40:10 GMT
Accept-Ranges: bytes
ETag: "f79b80d2e9decd1:89fd"
Server: Microsoft-IIS/6.0
Access-Control-Allow-Origin: *
X-Powered-By: ASP.NET
Date: Sat, 22 Dec 2012 22:04:23 GMT
You will be looking for the “Accept-Ranges: bytes” header which advertises that the server can accept range requests.
You can look at the request headers to see how this works from the client’s perspective. Using the network tab of the browser’s developer tools or an add-on like Firefox’s Live HTTP Headers. Go to this demo page and you’ll see “Range: bytes=0-” as one of the headers the browser sends when making a request for the video. This is the initial request for the first chunk of bytes. A successful response will begin with a “206 Partial Content” response code. The response will include the “Accept-Ranges: bytes” header to show that range requests are accepted. The Content-Range header (e.g. “Content-Range: bytes 0-3771428/3771429”) shows the range of bytes which were transferred in the current response followed after the slash by the total number of bytes in the file. You’ll also see in the time rail for most players that part of the video timeline has been “buffered” and is available to play. The Content-Length header will show the actual number of bytes which were transferred with each request.
If you play the video up to near the end point of what is “buffered” you’ll see that another range request is made. You can also pick a point later in the video and see which range of bytes are requests. The whole process by which the browser makes determinations of how much and when to buffer video is explained in this Chromium image at the bottom of the page. Note that not all browsers in the network tab of their developer tools give the same feedback about requests for video assets. Some will show multiple requests on different lines. Others will show a video on a single line and extend the download time line as more of the video is downloaded.
You’ll have to check with your particular server for how to enable range requests if you are not seeing these headers or this behavior. Apache and IIS are reported to serve range requests by default.
Search Engine Optimization and Other Site Considerations
Once you have a site and are serving up video and everything is working nicely across all browsers and devices, you will want to promote your site and make it more discoverable. Just like with the rest of the technology behind HTML5 media, there is a lot to cover here, but following are some pointers to get you started in making your video more discoverable. Google provides a whole section of their Webmaster EDU site for video search. Most of the tips here are taken from that guide with some details filled in.
Every video should have a “dedicated video play page for each video.” It is technically possible to switch the video source dynamically with JavaScript and play more than one video on a page. A single page could be set up to play through a whole playlist of videos. Such playlist pages are not recommended. Having your video have a dedicated play page makes it easier for search engines to index the resource and easier for users to bookmark. It avoids having duplicate content problems. Every video resource should have exactly one page it is watchable on.
You are already publishing a sitemap for your site (Right?!) so that the search engines will better discover and crawl your site. If you have video on your site that you would like to get indexed, consider adding your videos to your sitemap. There are some fields which are required and others that are suggested. This might effect what kind of metadata you keep on each of your videos so that you are able to generate a sitemap which Google will use. Google can crawl many different video types, but MP4 is the only type which is regularly used with the video element.
You can also improve how your videos may be indexed by including embedded semantic markup like Microdata (or RDFa Lite) using the Schema.org Web vocabulary. (You can read more about this in my Code4Lib Journal article HTML5 Microdata and Schema.org.) You will want to use the VideoObject schema. Note again that there are some properties that are required for Google to index a VideoObject, so you will want to make sure you are collecting this data for each of the videos you want to mark up this way.
The examples of using Schema.org markup given by the Google and Schema.org pages show the video as an embedded Flash object. The markup does not differ very much, but let’s show our example video marked up with Microdata and Schema.org (and provide some explanatory comments).
“`html Microdata and Schema.org VideoObject
Getting a Book in DH Hill Library
<!– The elements are hidden to the human user, but still visible to robots. –> <!– Convert the video duration from seconds to ISO 8601 date format. Another reason to cache the duration and keep it with other metadata like title and description. –>
<!– same as poster image –>
<!– The MP4 source of the video. –>
<!– uploadDate: Date when this media object was uploaded to this site. I’m guessing this is used to determine the freshness of the content. –>
<!– The height and width values can be determined with the videoHeight and videoWidth properties of the video element. It looks as if the values of these properties should really be a http://schema.org/QuantitativeValue. I’m guessing that the Schema.org examples are out of date since the GoodRelations additions have only come recently. So this is what it would look like once the Schema.org partners understand QuantitativeValue, though the Structured Data Testing Tool does not seem to understand it yet. These values below are probably best to use for the time being. –>
Getting a Book in DH Hill Library is easy!
You can paste the above markup snippet into Live Microdata and see the JSON output:
javascript parsed Microdata for VideoObject
{
  "items": [
    {
      "type": [
        "http://schema.org/VideoObject"
      ],
      "properties": {
        "name": [
          "Getting a Book in DH Hill Library"
        ],
        "duration": [
          "T1M49S"
        ],
        "thumbnailUrl": [
          "getting_a_book.png"
        ],
        "contentURL": [
          "http://YKK/video/getting_a_book.mp4"
        ],
        "uploadDate": [
          "2013-01-10T08:00:00+08:00"
        ],
        "height": [
          "526"
        ],
        "width": [
          "840"
        ],
        "description": [
          "Getting a Book in DH Hill Library is easy!"
        ]
      }
    }
  ]
}
HTML5 Audio
Both <video> and <audio> are defined as media elements, so they share many of the same attributes. There is no poster attribute for <audio>, but there is still the option to use a src attribute or one or more source elements to provide the URI to the audio file. One big difference is, of course, which formats will allow HTML5 audio to work across browsers and devices.
Future of Media on the Web
The simple video element is rather pedestrian these days. There’re so many other interesting things happening with media on the Web.
- Web Audio API: Not the same as the
<audio>element - WebRTC: Real Time Communication between browsers
- Popcornjs: Sync other content along with other time-based media.
- Canvas + Video: Adding a video to a canvas adds all sorts of possibilities for what you can do with video in the browser. Here’s a demo of an exploding video.
- Media Fragments: Make it possible to address a fragment of a piece of media using URIs.
- Media Groups
Conclusion
HTML and standards for delivering media on the Web are changing quickly. Browsers continue to implement more of the specifications or otherwise change their implementations. This guide currently has some outdated information.